Speak EV - Electric Car Forums banner

Delphi Granny Charger Repair IC-CPD Aptiv 240V 10A

76K views 107 replies 35 participants last post by  HandyAndy  
#1 · (Edited)
An owner of one of these decided to swap the 13A plug for a Commando one, only to discover after cutting it off that there are 6 wires going into the plug! I acquired this, and have repaired it with a chunky new 13A Masterplug and have fitted the 2 thermistors inside where they belong. I'm posting what I've learned so as to help anyone else with a damaged/destroyed plug, or wanting to do the same kind of plug-swap, so they can buy they correct valued thermistors if required.

The original owner carefully disected away the plug, and rescued both thermistors & the fragments of wire, enough for me to be certain of the connections. Thank you!

In addition to the usual 3 wires, the cable from the EVSE has 3 more coloured Black, Purple/Grey, and Purple/Black.
One thermistor is connected between Black and Purple/Black.
One thermistor is connected between Black and Purple/Grey.
The black wire appears to be the common return/ground for these, as both white leads on the thermistors are soldered together with the black wire.
I believe the thermistors to be Vishay NTCLE100E3103 which are 10k Ohms at 25C. Colour code Brown-Black-Orange.

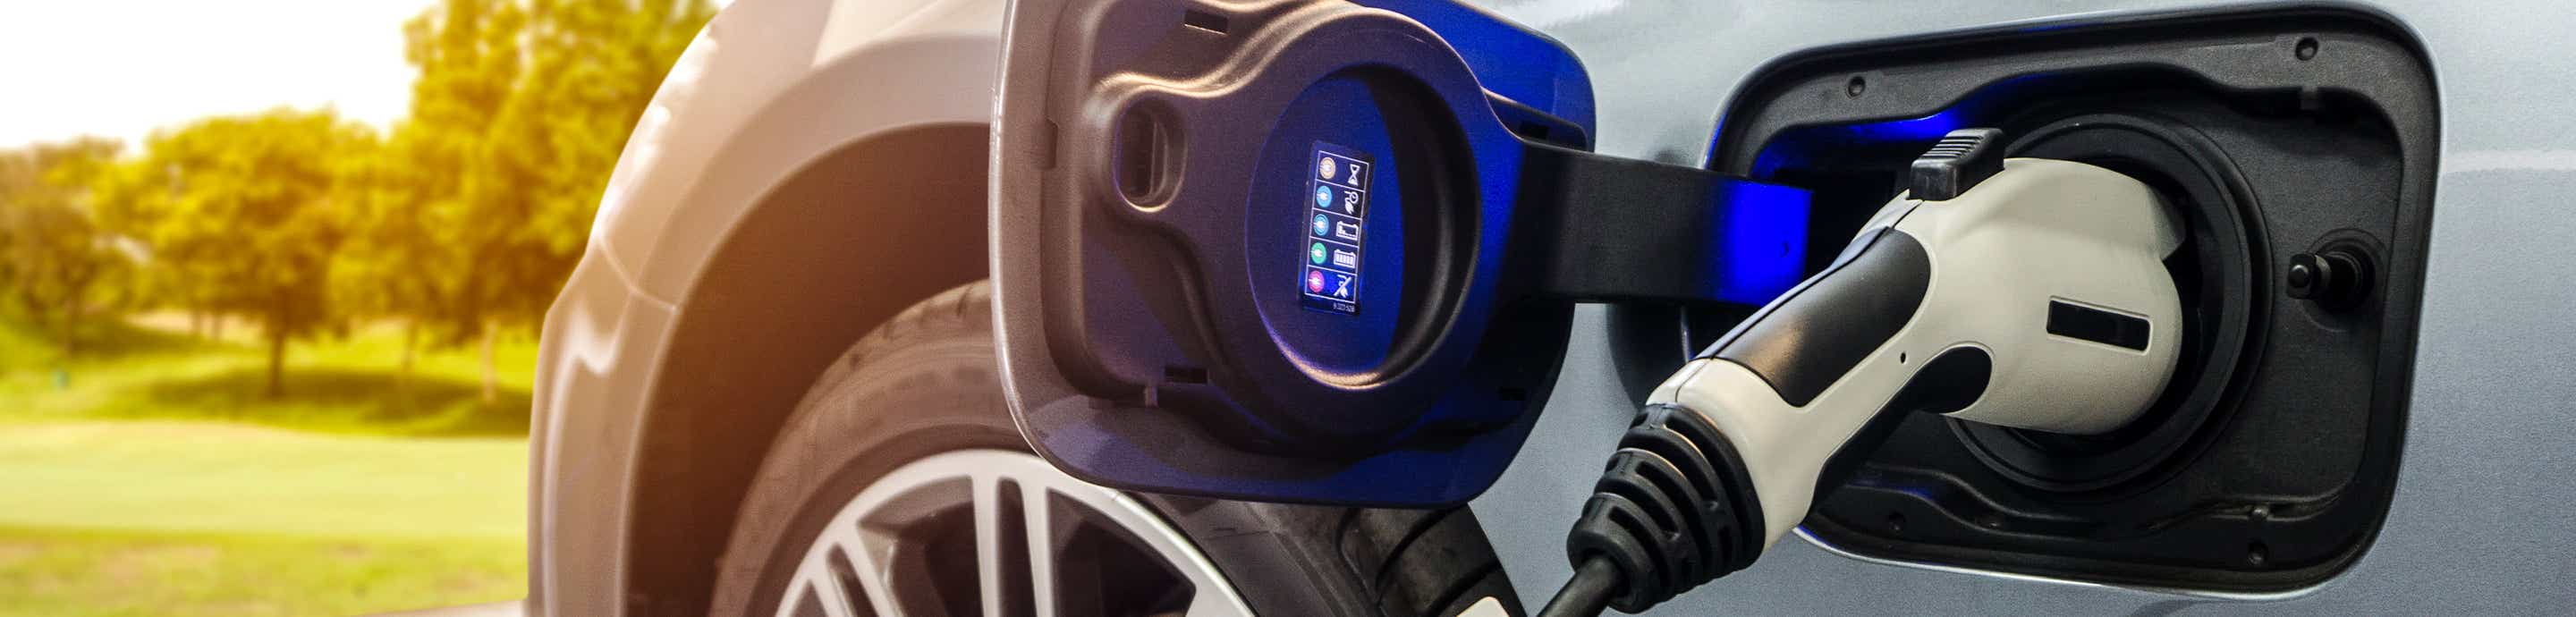
Type-2 plug EVSE (from a Bmw, probably i3) with new plug fitted:
125434


Underside of EVSE:
125436


Wire fragments:
125435


13A Masterplug
125437


A very small amount of trimming was needed inside the Masterplug to not trap the thermistor wires. In the Rhs view one thermistor has been tucked beside the Neutral wire, and the other thermistor sits above the fuse.

I checked the resistance of the 2 thermistors carefully, letting them cool slowly from 100C on my K-thermocouple-controlled Heated Base Plate. I believe the thermocuple temperature will have been at most 2 degrees C cooler than the thermocouple reported, and that reports in 1C intervals. So there's a fair bit of variation in the resistances I measured while the temp controller (an industrial Toho unit) was reporting a single temperature.
Here's a table of the max and min resistances (Ohms) I measured at a series of temps, and also the nominal resistance expected from a Vishay NTCLE100E3103 thermistor datasheet:

Temp Min Max NTCLE100E3103
100 707 759 677
95 800 847 786
90 908 957 915
85 1046 1099 1070
80 1224 1294 1256
70 1680 1768 1753
60 2380 2502 2490
50 3437 3556 3605
40 5044 5353 5330
30 7470 7800 8059
25 9187 9675 10000
24 9642 10110 (no data)

Given the variability in thermistors (the 2 I tested were usually about 30 Ohms apart, and must have been near-as-dammit identical temps) I consider this a pretty close match, certainly accurate enough for this Vishay thermistor to be used as an excellent replacement for a damaged original. My thanks to Farnell (& Cpc, part of the same group) for making the datasheets & parts available.
 
Discussion starter · #6 ·
Don't know where you'll find the manual online - one possible site that google found (regerbu.cleansite.biz) is apparently infected with malware, so Avast booted me out of here before I got in to look! But I wouldn't worry about it. Either it works, or the error lights should be decipherable from the table on the back. My own granny charger (different make) has had a lot of use over 4 years, and eventually wore out one of the relays inside. Symptom was it would overheat itself over 1/2 an hour-ish period, and case got noticeably warm. These things aren't ventilated, as must be showerproof, so tend to get warm internally. These relays are replacable, once you have the thing apart. Shouldn't be a lot else to go wrong, unless your 13A socket starts to get warm, so do keep an eye (or finger!) on that & check regularly it's happy.
 
Discussion starter · #11 ·
Interesting the thermisters are located next to the neutral and earth, but I thought the heat generally came from the fuse connectors.
Agreed that the fuse area is usually the heat-generator. In my repair I tucked one thermistor above the fuse, and the other went the other side near the Neutral wire. This white plastic plug looks like a standard lightweight domestic item, probably has no space to do this in it. Less than ideal, but better than nothing!
 
Discussion starter · #12 ·
Do you have any experience to upgrade 110v US charger to EU voltage? ...
Sorry, no. Would not surprise me at all that a voltage swap attempt fails, as 250V (nominal) EVSEs are known to cut-out & shut down if the mains supply drops too low, or even overshoots the max a bit !!! This has causes a few dropped charges, e.g. where there's a load of houses with solar panels in the street & no-one's drawing much power, so the voltage creeps up over 250...
 
Discussion starter · #15 ·
Assuming no damage to wires etc inside, yes. I use a scalpel & great care to shave the moulded rubber off. Take great care not to remove a finger, always try to work the blade away from you. Think where the blade will go when you slip, or if the tip snaps off!
 
Discussion starter · #18 ·
Yes, that board is totally destroyed. Hope it didn't damage your EV. My granny EVSE, different make, also had a similar blowup, and damaged a controller module in my Ampera. Big repair bill. I think your best option is simply replace with a new one, lots to choose from.
 
Discussion starter · #25 ·
I should have looked at this post before cutting my granny charger. This is a very useful post even with hindsight.
Thinking this through would I be right in assuming that the plug can be changed to a commando plug and the thermistors are added if I wanted to do that?
Yup should work.
 
Discussion starter · #27 ·
HI Andy, thank you for your very useful information. I have the same problem, they cut my schuko cable, but in addition to the single-phase power supply wires, I have the three wires but of different colors: purple, white and orange.
Do you have any suggestions?
Thanks ciao Giglio
Giglio, what is your problem exactly? If you have the original moulded plug,, that should have the 2 thermistors inside. If you are carerful you can cut away the original plug and save these components. Are you trying to fit a different plug? Please post some pictures. Your plug will be different to the UK plug!
 
Discussion starter · #31 ·
Count the lobes. I expect 6, but could be 5. If 6, it's probably a Torx Security Screwdriver Set job, see eBay. If 5, no idea. Probably want the T25 or T27 size.
 
Discussion starter · #34 ·
Hi Andy,
First of all thank you very much for the valuable information you shared here.
I have the same charger you and "strange harm" have on the picture, with code product 35025802. Mine stopped charging after 4 years. When I connect it to the wall plug all LEDs are off and in the past the power one was always green. Looking for the error code on the back, with all 4 LEDs off it shows a symbol like a wall plug.
What do I have to do on this case, to try to open the plug and check if the fuse is damaged and replace if needed or do I need to buy these thermistors with a new plug and replace the old plug completely as you show here.
My plug is EU, only with two pins and ground.

Thanks for your support and best regards Nuno.
Nuno, without looking at your EVSE myself, it's hard to say what's wrong. I suggest open it up, and you'll see the thin wire(s) going from the PCB to the plug, and you need to unplug these from the PCB, and use a Multimeter to measure resistance between these wired and the ground wire coming back from the plug. It's possible the thin wires have fractured = fatigued = broken, in which case you need to work out if the break is at the plug end, or the EVSE end.

Let's assume the this this wire is broken.

You might be able to work out which end it's broken at, by connecting the meter to check continuity, then flex/bend the wire at the plug end, and at the EVSE end. Try compressing the outer cable to make the wires "shorter", this just might push the break together enough for the meter to suddenly show a connection.

If you can't work out which end is broken, I suggest shorten the wire at the EVSE end as that's easy to do, Cut off the thick cable maybe 2 cm beyong the outlet from the EVSE, remove the insulation etc & check for conductivity again. If you're lucky, you've found the bad piece of wire! Reassemble the cable, solder it all etc.

If this fails to find the break, do the same thing at the plug, cut that off, strip the insulation from the wires, you now have a long piece of cable, bare wires at each end. You can grab a wire on the copper end and pull gently with pliers, if there's a break nearby, the strands of copper will pull out!

Replacing the plug is a slow job. If the plug is moulded onto the cable, you need very sharp knife, I use a Swann Morton scalpel, and very carefull shave-away the rubber, revealing the wires and bits inside the plug, but trying not to damage the thermistors. These should be ok, but again check them for resistance. Then reassemble thermistor(s) back into the new plug somehow - I'm not familiar with internals of your plug!

Post some pics here of the error being shown, inside of the EVSE etc, it all helps.

And when you do reassemble, I suggest you use a powerful soldering iron to resolder ALL the high-current connections, and the soldered tracks on the PCB, as solder joints fatigue with time and these ones need to be re-made periodically.

Good luck!
 
Discussion starter · #43 · (Edited)
@Nuno , here's a pic of the thermistors disected out of a UK plug.
Image


The wires look to be the same as yours, and assuming I chose the correct replacement thermistor, I'd expect to see 10 kOhms at 25C.

In yr post you said "I've measured the resistance and in all 3 wires value is close to 284kohm with plug connected to 220v and 0.0 ohm when disconnected. " Please do NOT go poking around inside while plugged into 220V ! Risking all sorts of problems, if you slip with the meter it's easy to short-circuit something and it all goes bang.

You do NOT want 220V around, and we do not need it, while we're checking out the thermistors & cabling to the mains plug!

the 12k Ohms you measured from black wire to the other 2 this wires is fine, so your thermistors are not the problem. Feel free to warm up the plug using a hairdryer, the resistance of the Viskay 10k thermistor I believe to be close to the actual part will change from 10 kOhm at 25C and drop to 3.6 kOhma st 50C. I'm expecting to see a drop in resistance of that sort of amount.

The resistance to Earth from these wires (290 kOhms) is totally irrelevant, and unknown. Some EVSEs wire one end of the thermistors to the Earth pin inside the plug, clearly this one does not.

You say the resistance of the thick mains cables all over the place is fine. In this case, I agree with Spiny that it's likely to be a failuire of the low voltage supply somewhere.
 
Discussion starter · #47 ·
@Nuno, one of your photos suggests something's got rather old. Your big PCB is labelled HW 4.12.4 and I have a pic of another EVSE, same design, with HW 4.16.1 from a repair of October 2021. There are slight differences in the layout of the mains pins on the PCB, no idea what else got changed or why.

Another pic suggests a bit of overheating, or ageing anyway. See this cropped view where I've arriwed bits that look suspicious to me. The big mains solder-joints should be nice & smooth & shiny. If they're looking rough, pitted with tiny holes in, or damaged, then you may have fatigued joints which simply are not carrying power properly. These joints should all be resoldered & checked. You can do simple continuity checks on these big high-current pathways, expect to see abot 0.2 Ojms which will be the resistance of your meter's wires. Check the meter by measuring the resistance with the test-tips touching each other. 0.2 to 0.4 Ohms is ok, 1 or more ohms suggests bad leads. The resistance around the circuit boards on these high current pathways should be tiny, less than 0.01 Ohms.
Image
 
Discussion starter · #48 ·
@Nuno, next thing is see if you have low-voltage power around.
The small PCB has a chip on it I can recognise, labelled STM32F 030C8T6
this is a microprocessor. Here's the datasheet for this chip.
https://4donline.ihs.com/images/Vip...terIC/IC/SGST/SGSTS49303/SGSTS49303-1.pdf?hkey=6D3A4C79FDBF58556ACFDE234799DDF0
It runs off 2.4 to 3.6V, so somewhere this voltage should exist on this small PCB. It's a 48 pin package.
The "dot" in one corner marks where pins 1 and 48 are. These 2 pins are both Vdd and should be 2.4 to 3.6V.
Vss is 0V and is on pins 47 and 23, and these should be connected to the Ground plane of the PCB.

With NO power applied, I suggest you trace the connectivity of these pins, and find a couple of places where you expect to see 3.6V and 0V somewhere on the PCB, well away from lots of other pins! Then, AT YOUR OWN RISK, I TAKE NO RESPONSIBILITY IF YOU KILL YOUSELF, carefully reassemble the whole lot back into the case, or somwhere where you can get at your 2 new test-points with your meter without getting antwhere near the 220V live stuff.

Ideally you should be wearing a pair of 1000V electric-insulating gloves with a pair of leather gauntlets over those.
If you are able to connect the meter using clips and not need to hold the probes yourself, then please do so, and stand back when you switch on.

You should then be able to plug the EVSE in, switch it on, and measure the voltage across the 2 test pins. If you do not see 2.4 to 3.6V, then your low voltage supply has broken. But I am now at the end of my advice, as I do not have one of these to play with, and I do not know anything about the low voltage generation in this EVSE.
 
Discussion starter · #51 ·
Hi i have same problem but i have diferent colors of cables orange, purple and white how i connect it?
Look at post 43 Delphi Granny Charger Repair IC-CPD Aptiv 240V 10A just above. One of the wires is the common Ground wire, the other 2 each have their own thermistor. So you need to measure the resistance between all the wires. When you find 10k Ohms between 2 wires, your have one thermistor & the Ground wire. When you find 20 kOhms you have the 2 thermistor wires, so the one you are not holding is the common Ground wire - Black in the picture above.
Then look inside the main unit to double-check this makes sense!

When you've managed this, please post the results here, colours of the wires, resistance values you got, and the ambient temperature when yo measured it all. This will surely help someone else in the future.
 
Discussion starter · #54 ·
Check the resistance between the red & white wires going into the plug you cut off. Maybe they reduced to 1 thermistor, not a lot of point in 2 inside such a small enclosure that doesn't have the 13A fuse assembly UK plugs have. I'd expect 12k Ohms, maybe 10k.

Also check the resistance beyween each of those 2 small wires to the Ground wire. Suppose you got 20 kOhms on the above reading above, and this test gives you 10 kOhms on each wire to Ground, this tells you they've done what other granny EVSEs have done, = common-up the return wires from 2 thermistors & connect to Ground, and use the 2 thin wires as the other ends of 2 thermistors. In which case you need 2 thermistors wired up between the 2 wires & Ground in yr new plug.

If it's a huge resistance (> 12k ohms, probably much greater) then there's just the 1 thermistor in there with its own dedicated 2 wires.

Your old plug is presumably scrap so yo can shave plastic/rubber off it carefully & recover the original thermistor(s) if you fancy!
 
Discussion starter · #56 ·
Tried to extract the probe from the plug. Totally destroyed it...
Don't know where to go next. I tried 2 10ohm resistors like the following. Did not work, fault blinking on charger. Thanks.
Ok, remove those resistors totally.
What resistance did you measure across red to whte, red to Ground, white to Ground before taking the Shuko apart? You need to clone that.
Very high resistance between any 2 wires means probably thermistor is not wired across these two.

Maybe it wants a single 10k across Red & White wires. Perhaps they aren't using the Earth as a common.
If error, put those 2 in series across the red & white to make 20K. As thermistors heat up, the resistance falls, so a higher value measn it's colder,
less likely for the EVSE to signal "overheating".
 
Discussion starter · #58 ·
Hi HandyAndy,

Thank you so much for posting this. I have exactly the same problem with a badly overheating plug which I am in the process of replacing.

Quick question - You mentioned the Vishay NTCLE100E3103 thermistor from Farnell. When I checked their website there would 14 different variants available. Could you check which one you ordered and let us know?

Many thanks,
Al
Of the 14 "variants" there, 3 have an extra delivery charge ÂŁ15.95 added probably sourced from EU or USA. So avoid those!
Looking at the associated datasheet there, the J/H/G letter denotes tolerance, 5%, 3%, 2%. You're not making a sophisticated temperature sensor here, just looking for a largeish temp-change to be detected.
The B0/T1/T2 denotes packing, bulk (loose), or a couple of tape-variants. Irrelevant to you.
Some have a date-code printed - again irelevant.
So go for the cheapest. They're all the same item as far as this job's concerned.

But if you can keep the existing thermistor, do so. I can't guarantee they used a Vishay one, this is my best-estimate fit for a replacement.
 
Discussion starter · #61 ·
Sounds like an improvement to me, as the heating occurs right inside the 13A plug where there are the springy contacts which can lose their spring, oxidise a bit & increase resistance heating etc. But I'm not a sparky!